Cleaning the hairbrush lint is an important task to keep your hair healthy. Though the cleaning task is not exciting but you can make it enjoyable by following some quick tips. This substance collects all the air debris, oil, dead skin cells, and dust to damage the hair health. To avoid these damage, you have to clean the brush lint properly as it makes the brush to last longer.
Contents
What is hairbrush lint?
The hairbrush lint comes with different elements like
Dead skin cells that stay as flakes in the hairbrush bristles or the hair
Dirt, dust and pet hairs that build up in the home
Sebum which is known as a waxy and oily substance produced from our sebaceous glands.
While brushing the hair, the broken strand hairs get stuck in the hairbrush lint.
Hairspray, food, and cream also build up in the hair, and the hair gets nasty.
Why clean the lint out of the hairbrush
You have to clean the hairbrush lint to clean the buildup. The buildup damages the hair skin. All these buildups come from hair products, dead skin cells, and debris. These elements turn into a breeding ground for bacteria and yeast. And when you brush your hair that nasty lint, your hair will also get nasty, and gradually your hair will get damaged. We all want to keep our hair healthy. That is the reason we need to clean the brush.
How to clean hair brushes lint – Step By Step Guide
Now it is time to know about how to clean the nasty lint from the hairbrush. Follow the steps with patience. You will get a clean hairbrush in no time:
Step 1
At first, free your hairbrush from the strand hairs that are stuck in the bristles. This is to keep the lint surface clean before washing it. If the hairs are stuck there like forever, use scissors or comb tails to cut the hairs to loosen the tangle.
Step 2
Take a bowl of warm water or take lukewarm water in your sink. Keep the hairbrush in the sink for some time. If any hairs come out, remove them from the water.
Step 3
Now add gentle shampoo and soap in the brush and massage the soapy water between the bristles. Take a wide-tooth comb to slide between the bristles. By this, you can get rid of the remaining unwanted hairs, dirt, and grime from the brush.
Step 4
Take a washcloth, toothbrush to wash the hairbrush fabric. Use the cloth and brush in every bristle’s space by scrubbing. Scrub the surface until it comes out clean.
Step 5
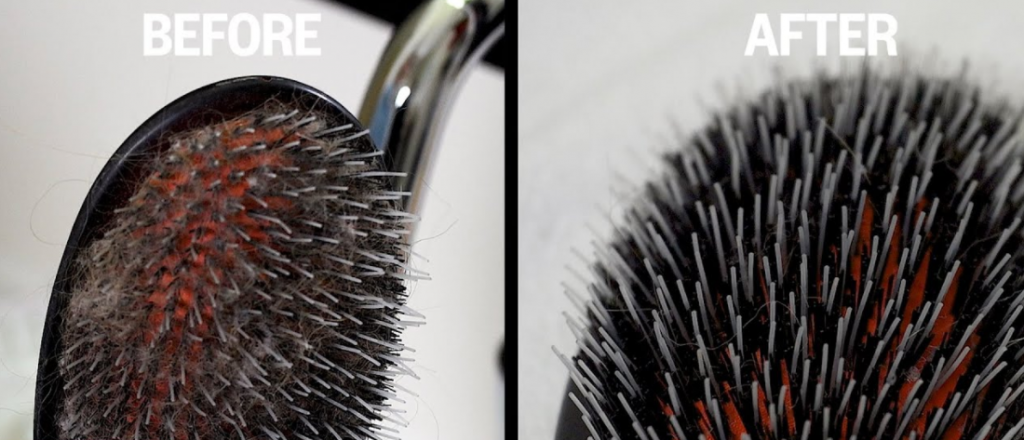
Take a dry towel and place the hairbrush on it. Place the brush by pointing down the bristles; this makes the water drip down. Leave the hairbrush for several hours or overnight. You will see how clean your hairbrush is afterward.
How to prevent the lint from getting dirty
While cleaning the hairbrushes, you may get awestruck seeing the dirt amount. If you can prevent this, you may not go through this daunting task often. You can take the below measures to prevent the buildup in the lint.
Use a nightcap while sleeping. By this, your hair will stay in shape, and the buildups form the sheet, bedcover will not get into your hair.
Take a satin pillowcase to keep your hair safe from dust and dirt.
Using a dryer sheet keeps the hairbrush catching dirt.
Bonus tips
Final thoughts
Hairbrush helps our hair to look good and healthy. So we must keep our hairbrush clean to maintain healthy hair. If you have a hairbrush with lint, you need to know how to clean the hair rush lint properly. If the lint stays dirty, then say goodbye to your good hair. Because it will damage your hair thoroughly. Clean the brush lint often per your use and help your health to look shiny and healthy.
